How to Add Google Analytics to Substack
For complete newbs (plus a cheat sheet for experienced website owners)
Hi,
This week, by special request, I’m pressing ‘send’ early to share my hard-won knowledge on Analytics for Substacks.
Analytics is a Google tool that allows website owners to get detailed statistics about who is visiting their website and what they do when they get there.
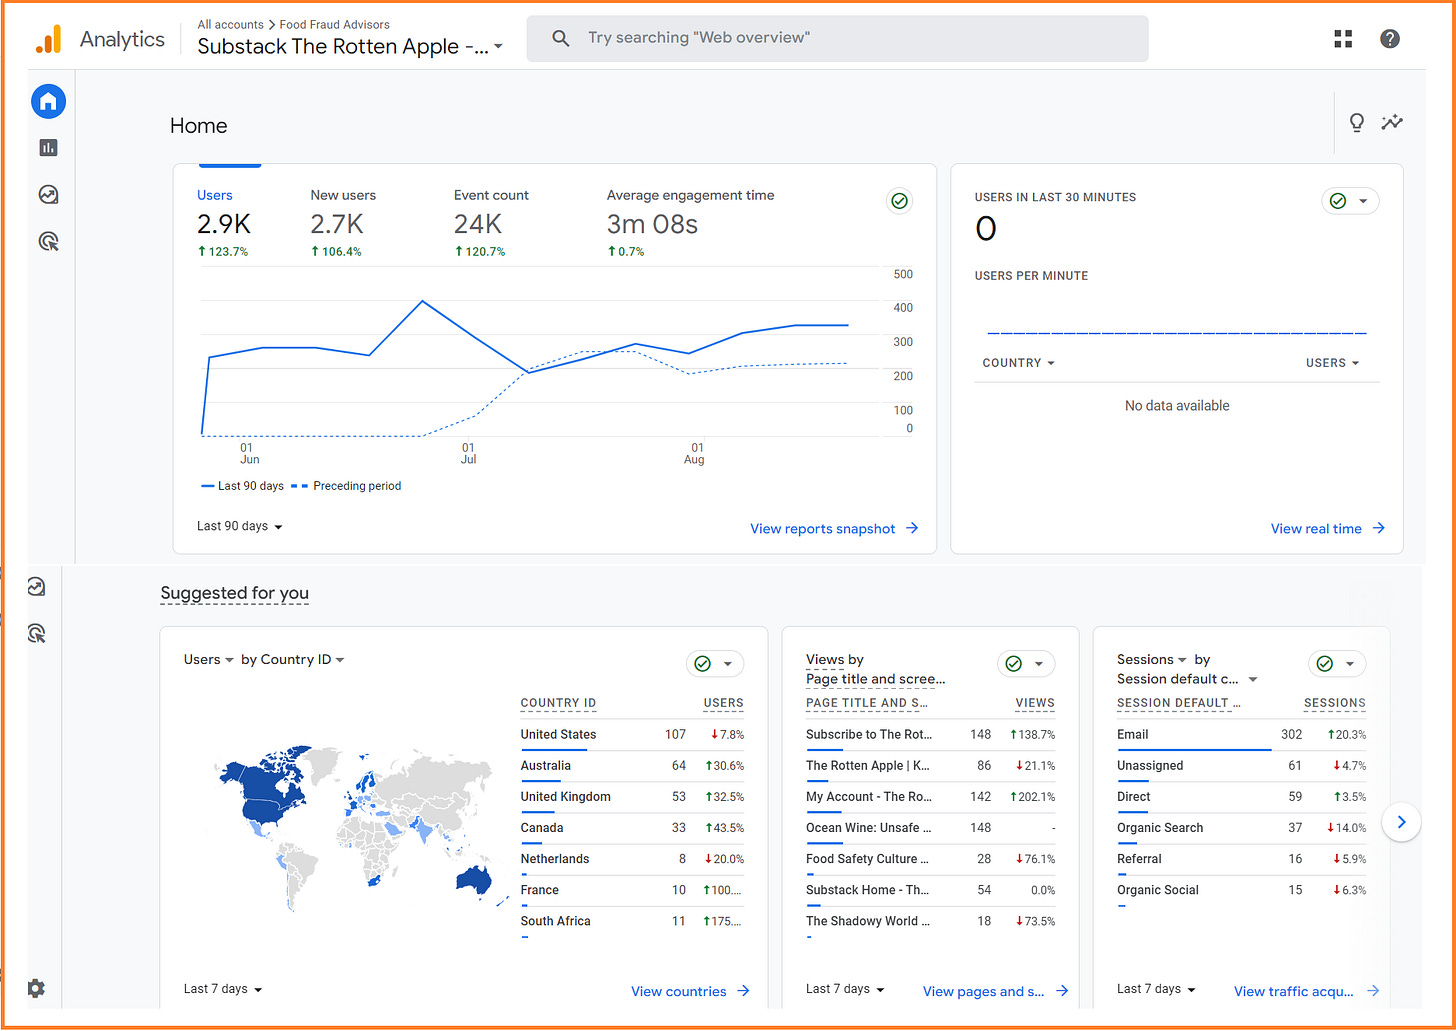
Here’s what the Analytics dashboard looks like for my paid newsletter.
Why Use Analytics?
Substack doesn’t have built-in features that show detailed statistics on which pages are getting the most views. Analytics does.
For example, if you want to know whether people are visiting your About page, Analytics can show you, whereas Substack’s native features can’t.
Your mission (should you choose to accept it)
Using Analytics is not easy, even for those with a little web-tech experience. Google tools like Analytics often have confusing interfaces and their support documentation is rubbish.
This is a mission for a dedicated Substacker with a well-established publication (or a curious web-nerd). If you have less than 1000 subscribers don’t bother: you won’t get enough data to make useful decisions and your time would be better spent creating or promoting your work.
There are two ways to set up Analytics on Substack.
By adding Google Analytics on its own.
By using Google Tag Manager to handle the Analytics integration.
In past attempts, the only way I could get Analytics to attach to my Substack publication was by using Tag Manager. In this post, I share both methods and two versions: a short version for experienced website owners and detailed instructions for complete newbs.
Short Instructions for Experienced Peeps
(Cheat Sheet)
The following instructions are for people who have used Analytics before, such as with a Wordpress site. If you are not experienced, skip to the next section.
In Google Analytics get a GA4 tag for your website (use your publication homepage https://yourpublicationname.substack.com).
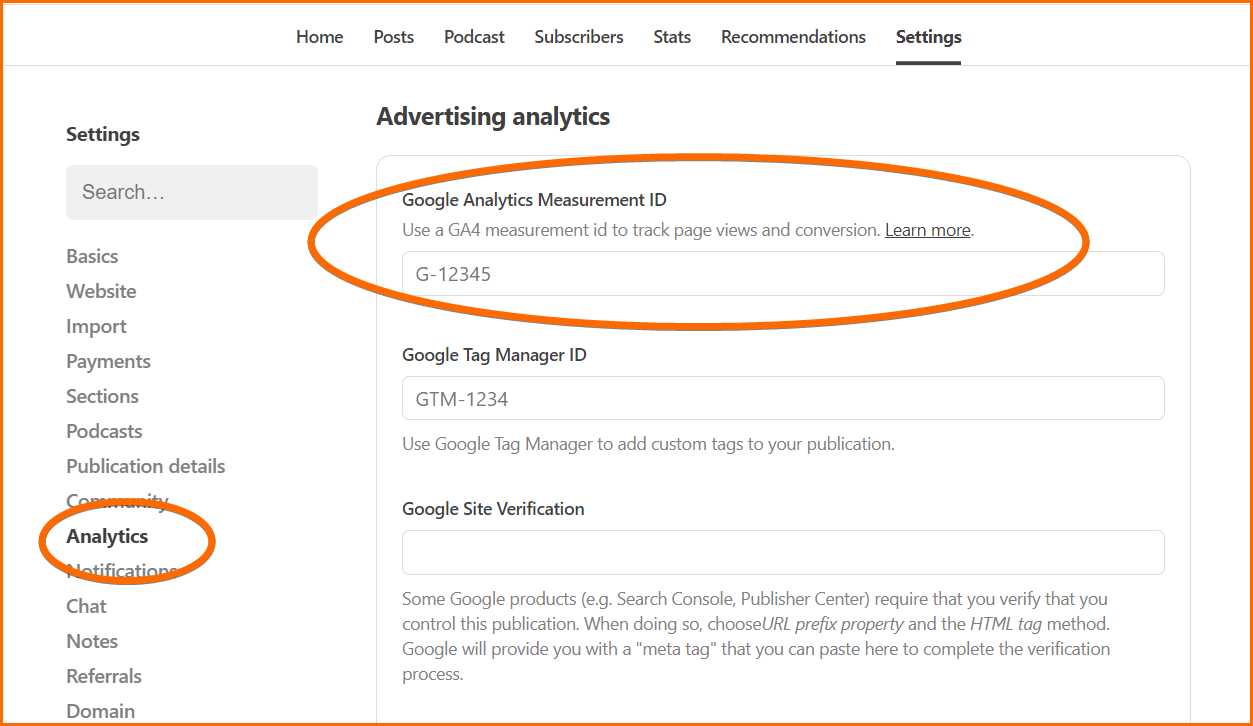
Paste the GA4 tag (G-XXXXXXXX) into the Google Analytics Measurement ID section of your publication settings [Publication dashboard > settings > Analytics]
Wait 48 hours. If you don’t see data in your Analytics dashboard, proceed to step 4.
Go to Google Tag Manager, create a new account and/or a new tag for your publication. Paste your GA4 code (measurement ID) into Tag Manager. Tag Manager will generate a GTM ID for you.
Paste the GTM ID into the Tag Manager box in the Analytics section of your publication settings [Publication dashboard > settings > Analytics > Google Tag Manager ID]
Long Instructions for Analytics Newbs
To connect Analytics and Substack, you need:
A Google Analytics account. This is the place you will go to see the traffic to your publication pages.
(Optionally) a Google Tag Manager account. This is a separate Google tool that can be used to provide a link between Substack and Analytics.
A Substack publication.
The steps below are for setting up Google Analytics 4 (GA4) because the old-style Google Tracking ID (Universal Analytics), with the format UA-XXXXXX-X is no longer supported.
Step 1: Create a Google Analytics Account
If you already have a Google Analytics account, do not create a new one, instead, go to Step 2.
Getting started with Analytics
Within Google Analytics you will first create an Account, then a Property. A property is a website, an app or a Facebook group, or a Substack publication.
A single Google Analytics account can be used to track activity on multiple properties.
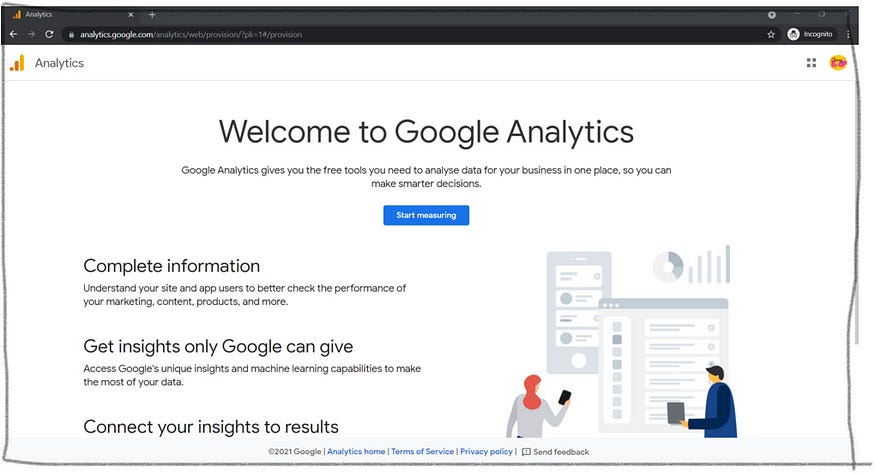
To create a new Google Analytics Account, sign in to Google (you will need a Google account or Gmail), then go to https://analytics.google.com/
To get started, click “Start Measuring”
On the next page, you will create an account name.
If you plan to build an empire of online businesses, use your brand name for the account name. You will be able to use this Google Analytics account to track activity on multiple websites, landing pages, Facebook pages and Substacks. Google Analytics calls these different pages/groups properties.
Create an account name and click “Next”.
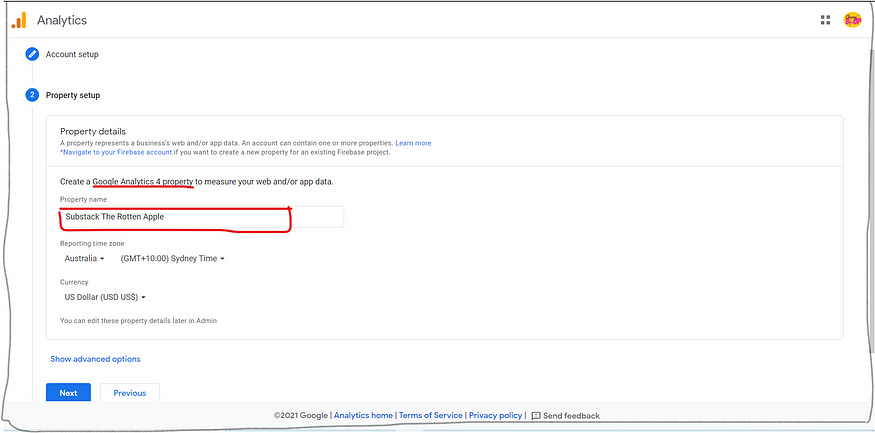
On the next page, Google will ask you to create a new property.
The property, in this case, is your Substack publication.
On the property setup page, choose a name for your property. I suggest you include the word Substack in your property name, eg. Substack ‘your publication name’.
Choose your time zone and your chosen currency.
After creating your property name, click “Next”.
On the next screen, you add information about your business.
For industry type, I chose ‘Online Communities’, which I think is a good fit for any Substack publication, despite which industry it serves.
For ‘How do you intend to use Google Analytics’ choose:
Measure customer engagement
Measure lead generation.
You can change those later if you want.
Accept the terms and conditions and email notification settings.
On the next screen, you tell Google where to get your data from. In the case of a Substack publication, the type of stream you are adding is ‘Web’.
After you choose web, on the next screen, Google Analytics asks for your website URL and a stream name. The stream name is a name you give that describes the source of your data (your data stream).
Enter the main address of your substack publication. Make sure you don’t have any extra elements (like /publish/settings) in your URL after .com/.
Example
https://publicationame.substack.com/
Enter a Stream name. Use a descriptive name, rather than ‘My website’. This will allow you to find it easily if you set up other properties later.
Google Analytics 4 then encourages you to activate enhanced measurement. This will supposedly help you to see more information about what users do on your pages.
For enhanced measurement, Google Analytics warns that you must ensure that no personally identifiable information is collected from your pages. That means information like email addresses. Because Substack collects email addresses, you should de-activate enhanced measurement.
After adding your URL and stream name, click “Create Stream”.
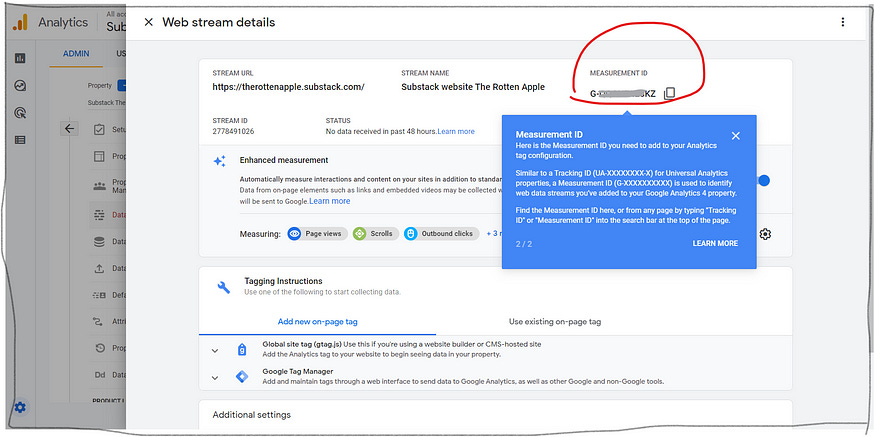
Google Analytics then creates a Stream ID and a Measurement ID.
The format of the GA4 Measurement ID is G-XXXXXXXX.
Copy the Measurement ID code and go to Step 3.
Step 2: For users who already have a Google Analytics Account
Only do this step if you already have an existing Analytics account. If you just completed Step 1, don’t do this step; instead, go to Step 3.
Log into your analytics account and navigate to Admin by clicking the gear-shaped Admin icon (bottom left of screen for me).
Within the Admin section of your Google Analytics account, create a new property. A property is a website, a subdomain, a Facebook group, or other place where you can measure traffic.
Give your new property a name. I recommend using the word Substack in the name so you can easily find it in your list of properties on your reporting pages.
Follow the guidance in Step 1 for what to do after choosing your new property name.
Step 3: Add your Google Analytics Measurement ID to Substack
In step one you generated an Analytics Measurement ID, which has the format G-XXXXXXXX.
Now open your publication settings in Substack and navigate to the Analytics section. Paste in the Measurement ID.
Publication dashboard > Settings > Analytics > Google Analytics Measurement ID
Substack will invisibly deploy your Analytics measurement ID on your Substack pages. The ID sends a signal to Analytics whenever someone views one of your pages.
Step 4: Check it works
Wait 48 hours.
Log into your Analytics account, at https://analytics.google.com/analytics/ to see if there is any data in your dashboard or if there are any error messages.
If it looks like data is being collected, you’re finished, hooray! If not, go to Step 5.
Step 5: (Backup) Only do this if Steps 3 and 4 did not work
In Step 5 we will add another layer to the connection between Analytics and Substack in the form of Google Tag Manager. This might help the two to ‘talk’ to each other.
Navigate to the Google Tag Manager website (https://tagmanager.google.com) and create an account for yourself.
Inside Tag Manager you will be prompted to create a website account. In Tag Manager, each ‘account’ corresponds to a separate website. Your account is your Substack publication (https://yourpublication.substack.com).
After you have created your Tag Manager Account, create a new tag by clicking ‘New Tag’ in the Workspace Overview section of Tag Manager.
Give your tag a new name, such as ‘your publication name Analytics tag’
For the tag configuration type, choose ‘Google Analytics: GA4’.
In the space for Measurement ID paste the Analytics Measurement ID you got from Analytics in Step 1. (It looks like G-XXXXXXXX)
Make sure there is a checkmark for “Send a page view event when this configuration loads”.
Ignore ‘Fields to set’, ‘User properties’ and ‘Advanced settings’. Scroll down to ‘Triggering’.
Open ‘Triggering’ and choose the trigger ‘All Pages’ by clicking on it.
Click ‘Save’ to save your work and then ‘Submit’ to make it live.
Your Substack publication’s account in Tag Manager now has a Google Tag Manager ID, also sometimes called a Container ID (GTM-XXXXXXX). You can see the ID in various places when you are logged into Tag Manager.
Copy the Google Tag Manager ID and paste it into your Substack’s publication settings.
Publication dashboard > Settings > Analytics > Google Tag Manager ID
Final Thoughts
If you made it to the end of this post/email, congratulations - what a behemoth!
Analytics is a good thing to have for your publication if you have more than 1000 subscribers. It provides you with more detailed information than you can get from Subtack’s ‘Stats’ pages.
Warning! Don’t waste your time and energy with Analytics if you have less than 1000 subscribers. Using Google tools is a recipe for headaches and will distract you from the most important job: writing high-quality content and publishing consistently.
Good luck!
Karen
P.S. If you found this helpful, please consider re-stacking this to Substack Notes, so other Substack writers can benefit from it too.






That was very easy to follow and set up, I just wished we were told at the beginning this isn't good if you have less than 1k subs xD
Really helpful walkthrough, Karen. Thanks for taking the time to publish this!